|
|
|
WELCOME TO MY DIY CAMERA JIB PROJECT COMPLETED: 01/APRIL/2021 The Camera Slider is no more. It was a useful tool for video work but it was also an overly large, heavy, unwieldy tool, especially by today's standards where everything is far lighter and more portable without compromising strength too much. So, wanting to expand my video making skills and the types of shots I can produce, I have decided to embark on a new project to build a DIY Camera Jib. As before there are a huge number of off-the-shelf options that are budget friendly, though looking at the ones I like made me realise it was well within my capabilities to build something very similar for half the cost, or less. So, let's begin... | The Plan
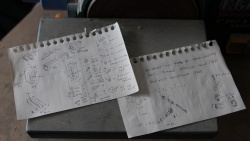
I had a good look around and as you might imagine there are a lot of plans and designs for various styles of DIY camera jib, ranging from janky wooden ones, ones made of monopod parts and tripod legs & springs,
all the way up to really nicely designed 3D printed and machined ones. Well, janky isn't my style ( be quiet, you... ) and I don't have a cnc mill or 3D printer, so instead I had a look at fairly simple commercially
available designs to see if there was anything I could reverse engineer from photos; as it happens, one item in particular caught my eye. The 'Jusino AT-6011' model that retails for around 150 GBP had a very nice and solid
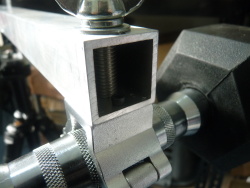
design and some clever features- I decided this would make an ideal design for me to base my own project on as the core of the design is just a couple of aluminium extrusions and two short box sections. Simple enough for me...
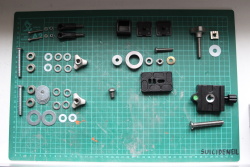
The Parts List
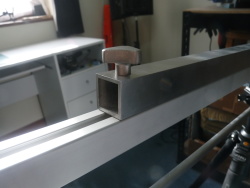
30x30x1000mm Aluminium square tube Assembly
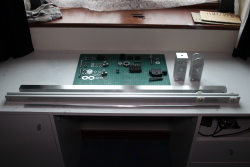
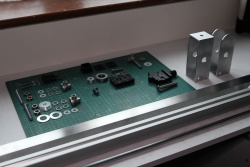
I didn't film myself or take any photos of actually cutting the few pieces I needed for the project- I wasn't really in the mood for messing around setting up my camera and lighting, having to work around it and avoid whacking it with meter-long metal bars.
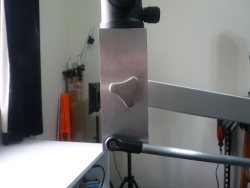
To be honest, all I actually needed to do was cut one piece of box-section aluminium in half, drill a few holes and trim the end off of one piece & round it over as you will see in the photos and video. Nothing at all very complicated or requiring an in-depth explanation- you aren't missing much really.
What I did do however was use my new Yi 4K+ action camera to film myself assembling all of the components in a short time-lapse; this is a brilliant little camera for the price and I look forward to using it more from now on- no more ancient keychain cameras.
Features
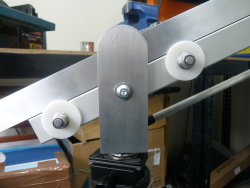
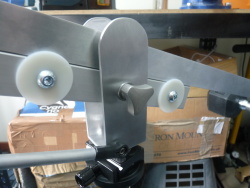
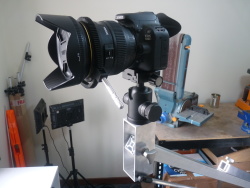
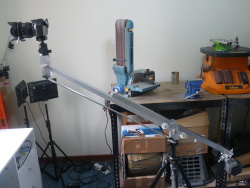
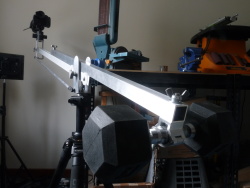
The main features are fairly simple to explain, starting with the 'camera platform' at the very front of the jib. This is where the camera is mounted ( via a ballhead ), and it pivots on a large bolt with the help of some flanged bearings.
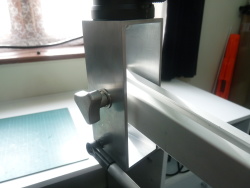
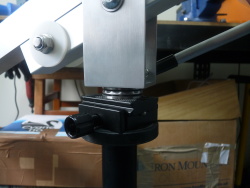
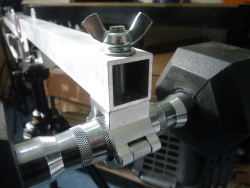
The camera platform is attached to the front beam which itself pivots on the central tilt & swivel base, which uses thrust bearings to provide smooth side to side movement even with several kilos of weight pressing down on it.
Below that is the tripod and Arca mounting plate, meaning the whole unit can be removed easily yet is held in place very securely.
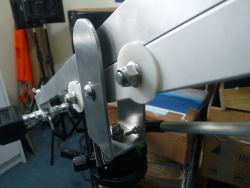
Above the front beam is the rear beam, which slides back and forth to finely balance the front and rear sections resulting in the jib remaining at any position without needing to be held. There is a locking knob at the front of the upper beam.
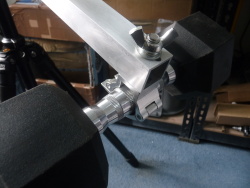
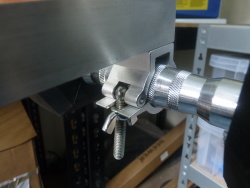
At the very rear is the counterweight, a 5KG dumbbell that is clamped in place securely yet easily removed for transport. A large bolt holds the clamp to the bar, and a smaller bolt prevents it from rotating.
Summary
I am extremely happy with how well this turned out- everything moves smoothly, no crunching or grinding or binding up- if anything it's a little too smooth and I could do with finding a way to a lock the up/down axis so that I can swing the jib
side to side like a pseudo-camera slider ( dual-purpose ftw ). It is quite heavy and over-built, pretty much par for the course for my designs but that's okay as I was never going to just sling it over my shoulder and go walking for miles with it- transport by car, for certain. Finished Pictures
Who doesn't love beauty shots of finished projects- if I am able to take the Camera jib to do some outdoor filming I will add updated pictures below, hopefully.
Demo video
The project video is now live on Youtube, watch below or on youtube- don't forget to Like, Share & Subscribe if you enjoyed it- it really means a lot and keeps me motivated to continue making new content.
|