|
|
|
WELCOME TO MY CUSTOM NERF GUN PROJECTS THESE ARE MY CUSTOMISED NERF BLASTERS |
|
| CONTENTS:
"METALLIC LONGSHOT" "THE POISON LONGSHOT" HPA LONGSHOT "BAZOOKA RIFLE" #11 NERF DEMOLISHER- WARHAMMER 40K BOLTER #10 NERF SLEDGEFIRE (2) NERF DEMOLISHER- WARHAMMER 40K BOLTER #09 NERF DEMOLISHER- FULL-AUTO SOLENOID NERF STRYFE #08 "PROTORAPTOR" "RAPTURION" NERF SWARMIRE (2) NERF SLEDGEFIRE HPA NERF LONGSTRIKE CS-6 NERF LONGSHOT PUMP-GRIP NERF SWARMFIRE NERF DEMOLISHER "WHITE LONGSHOT" NERF ZOMBIESTRIKE HAMMERSHOTS NERF ELITE ALPHA TROOPER
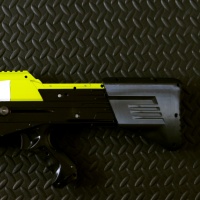
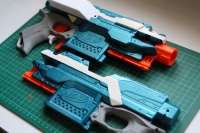
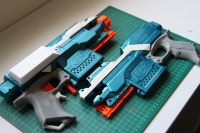
METALLIC LONGSHOT
LIST OF MODS: METAL TRIGGER METAL PLUNGER CATCH METAL BOLT SLED PUMP GRIP LOW PROFILE PICATINNY RAIL FLARED MAG WELL CUSTOM PAINT JOB PADDED PLUNGER HEAD DOUBLE SPRUNG PLUNGER AIR RESTRICTROR DELETED PICTURES:
ROUGHBREACH
LIST OF MODS: INTEGRATED DOUBLEBREACH GRIP CUSTOM PAINT JOB PICTURES:
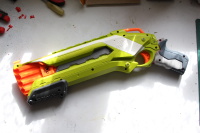
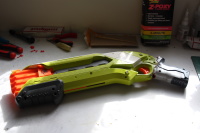
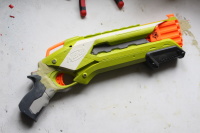
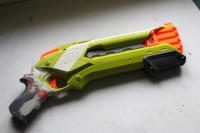
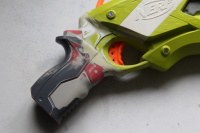
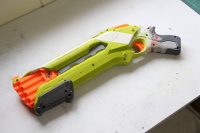
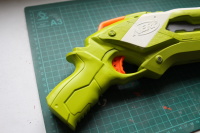
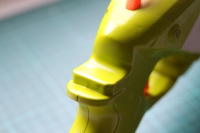
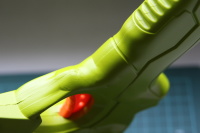
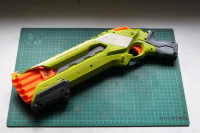
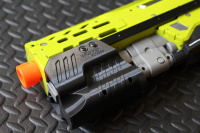
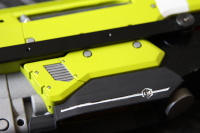
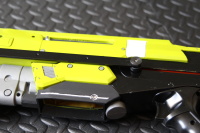
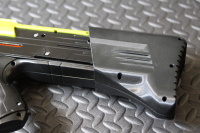
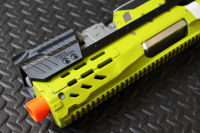
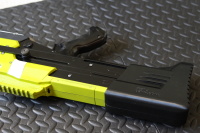
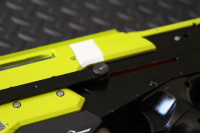
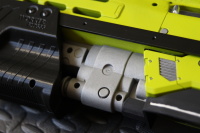
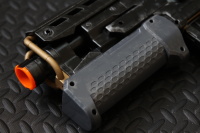
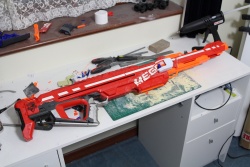
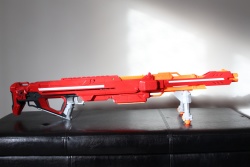
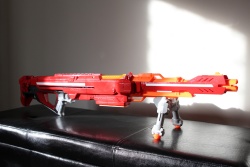
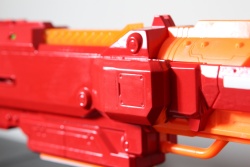
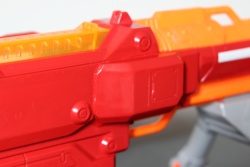
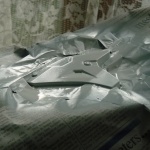
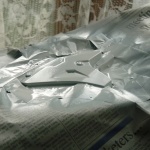
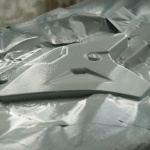
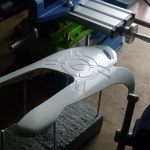
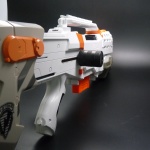
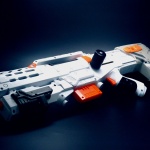
THE POISON LONGSHOT
LIST OF MODS: 14KG SPRING AIR RESTRICTOR REMOVED PRESSURE-RELIEF HOLE FILLED NEW O-RING SEAL ON PLUNGER PADDED PLUNGER HEAD ALL SAFETY LOCKS REMOVED WORKER PUMP GRIP WORKER PICATINNY TOP RAIL WORKER BUTTSTOCK ALUMINIUM BOLT SLED CREATEWITHEZEKIEL FLARED MAGWELL CUSTOM PAINT JOB PICTURES:
Performance is right around 120fps and handling is much improved thanks to the pump kit and longer butt-stock, makes for a great blaster. I kinda want to get an X-Shot Pro Longshot too at some point, just because...
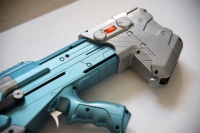
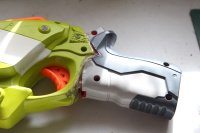
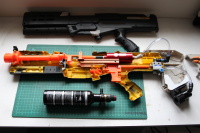
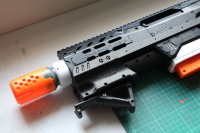
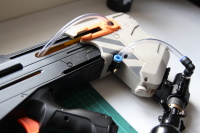
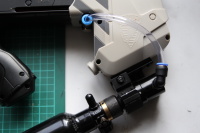
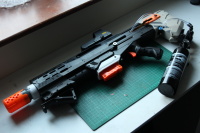
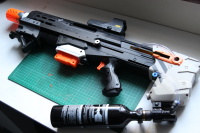
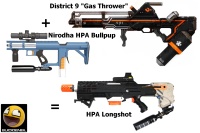
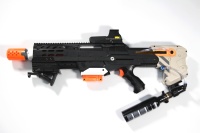
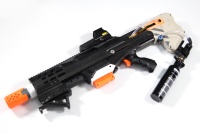
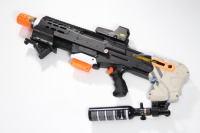
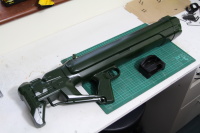
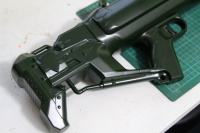
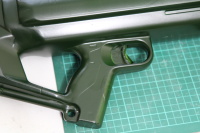
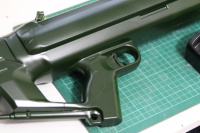
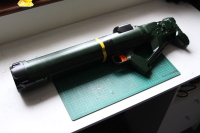
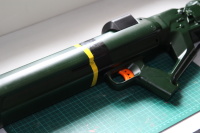
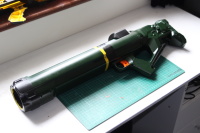
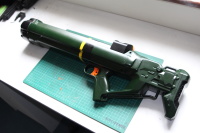
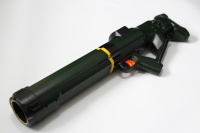
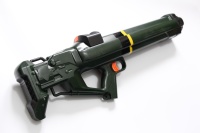
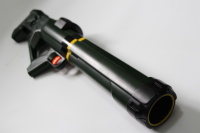
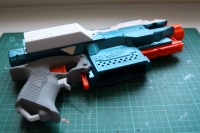
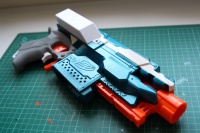
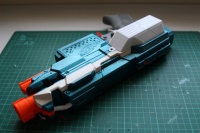
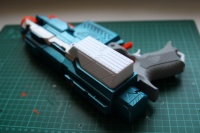
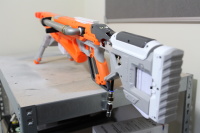
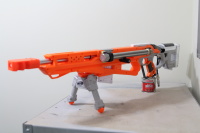
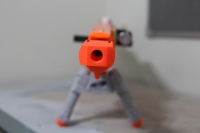
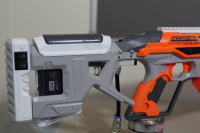
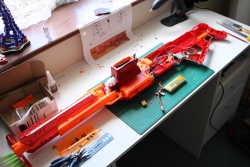
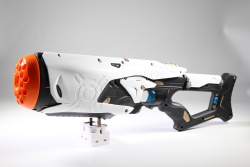
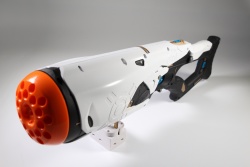
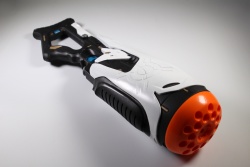
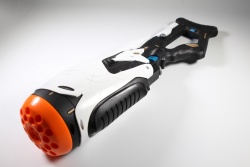
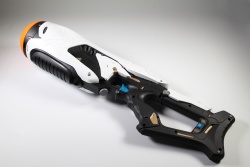
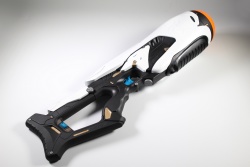
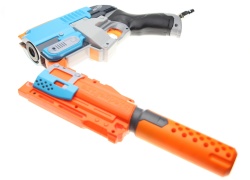
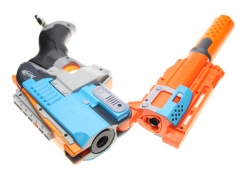
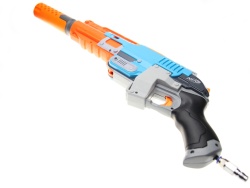
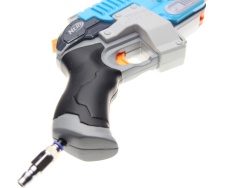
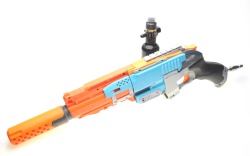
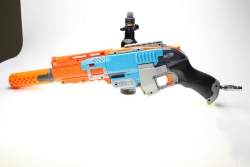
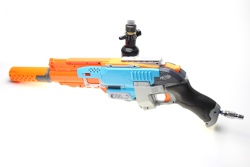
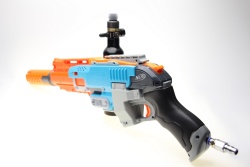
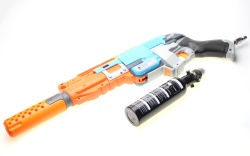
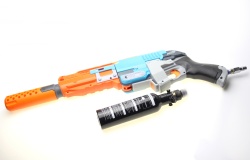
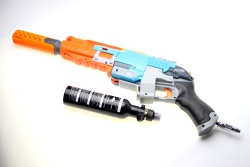
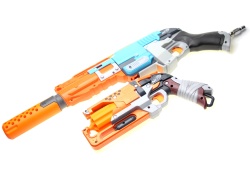
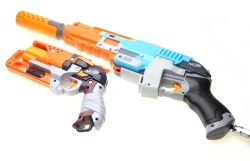
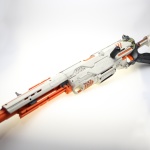
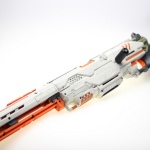
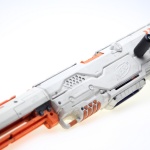
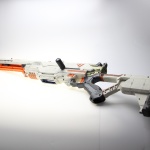
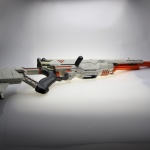
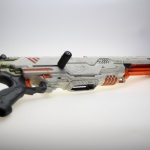
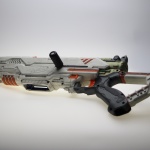
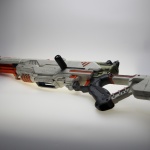
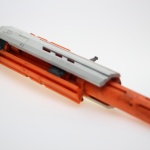
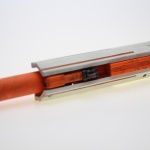
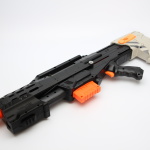
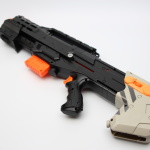
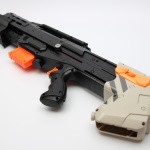
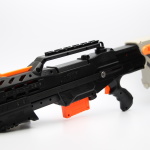
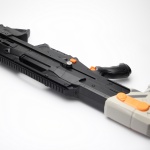
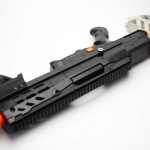
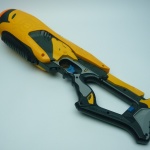
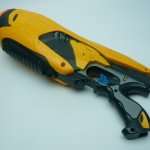
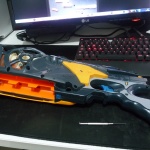
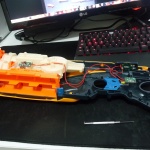
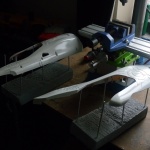
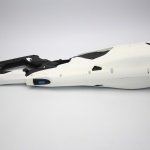
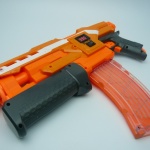
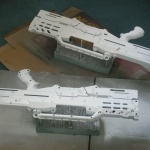
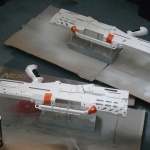
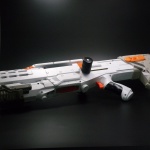
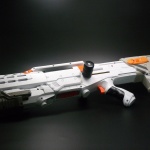
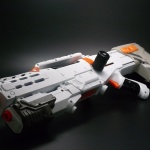
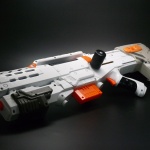
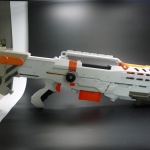
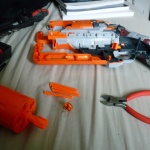
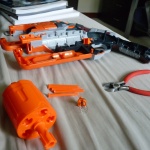
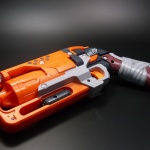
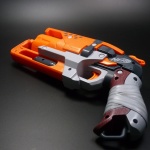
HPA LONGSHOT (DECOMMISSIONED)
LIST OF MODS: COMPLETE HPA SYSTEM SPEXBZ INSTALLED BRASS SLEEPER BREECH ALL SAFETY LOCKS REMOVED WORKER PUMP GRIP GAVIN FUZZY PICATINNY TOP RAIL ALUMINIUM BOLT SLED CREATEWITHEZEKIEL FLARED MAGWELL CUSTOM PAINT JOB PICTURES:
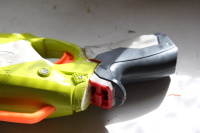
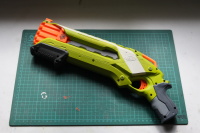
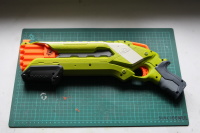
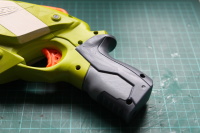
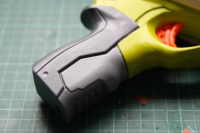
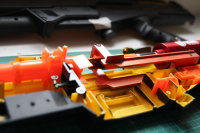
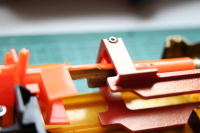
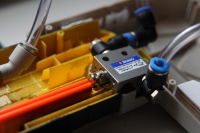
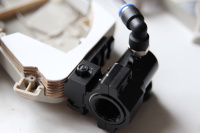
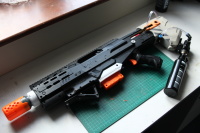
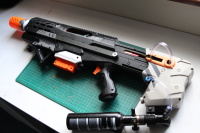
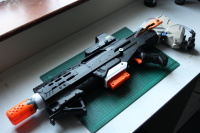
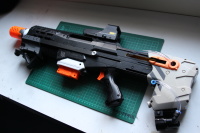
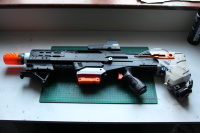
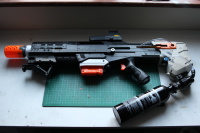
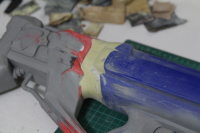
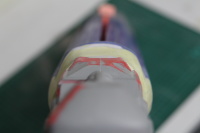
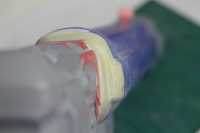
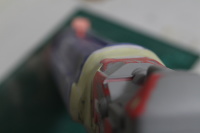
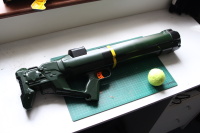
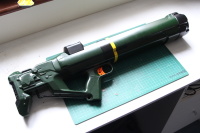
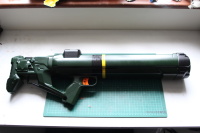
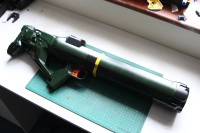
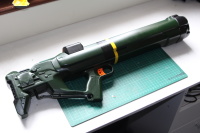
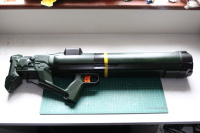
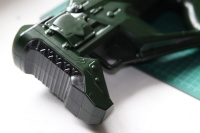
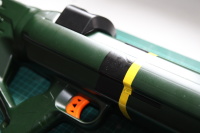
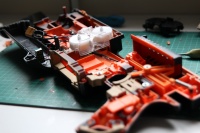
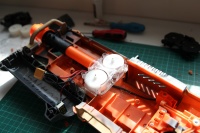
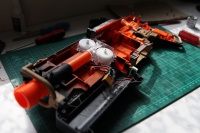
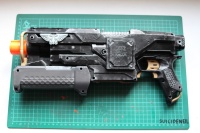
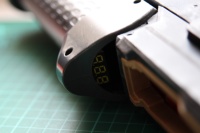
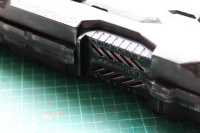
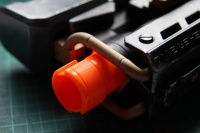
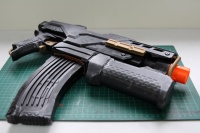
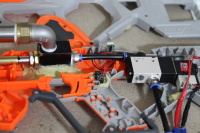
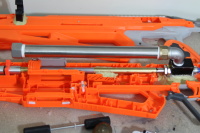
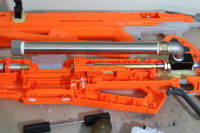
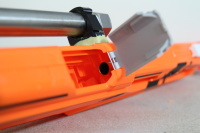
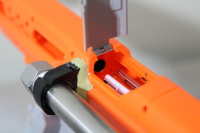
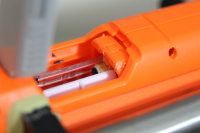
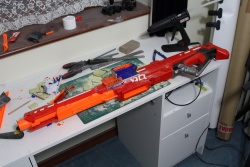
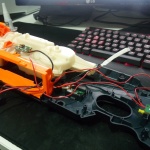
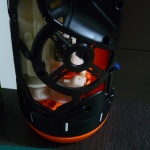
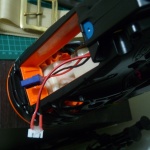
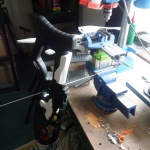
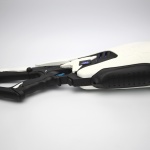
I have a 3000psi HPA bottle and SLP ( Super Low Pressure ) regulator feeding directly into a Micro regulator as the second stage, which in turn feeds a 3/2 way manually operated valve acting as the trigger which feeds air to the SpexBZ that powers the blaster. Darts are fed into a Brass 'sleeper breech' ( 9/32 Brass tube ) via a Worker pump-action kit for single-shot firing; you could replace the SpexBZ with a SuperCore for Semi-auto firing but for my needs, single-shot pump-action is fine. The real trick to make this all work however is that the SpexBZ is mounted directly to the bolt sled and slides back and forth with every pump of the foregrip- since I'm using full length darts there simply is no way to have the SpexBZ mounted in the shell and use a telescoping bolt/pusher set-up ( believe me, I tried- it's close, but just not quite enough space ). I know that half-lengths are the new hotness and have been for a long time, but whatever, I wanted the challenge and no one has done this before quite the way I have. At present I have the micro-regulator set for roughly 40psi that results in a dart velocity of around 100fps, perfect for indoor use. I can of course dial the pressure up though that tends to result in the darts popping- something about a rather direct blast of air into the rear makes them rather unhappy, funny how that works. The end result of all this work is a 2.6Kg ( 5.7lb ) pump-action monster that by happy accident does indeed closely resemble the 'gas thrower' weapon from District 9, as used by the alien character Christopher Johnson at one point. It's all fully functional with a removable air bottle and airsoft replica holographic sight- lots of fun but rather unwieldy, just as alien weapons should be...
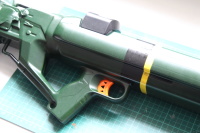
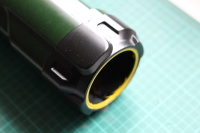
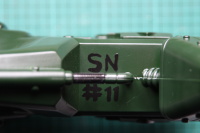
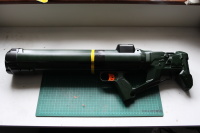
BAZOOKA RIFLE #11 (SOLD)
LIST OF MODS: INTEGRATED CENTURION STOCK & NERF DOG BALL LAUNCHER CUSTOM PAINT JOB PICTURES:
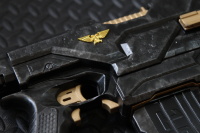
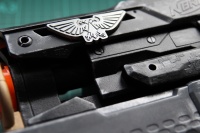
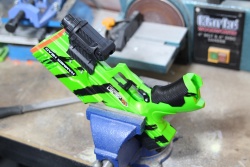
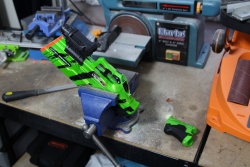
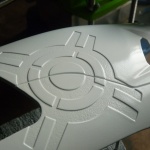
NERF DEMOLISHER- WARHAMMER 40K BOLTER #10 (SOLD)
LIST OF MODS: CUSTOM PAINT JOB & WEATHERING MINIMISED FORE-END REAL METAL IMPERIAL AQUILLA PICTURES:
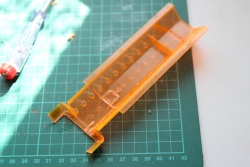
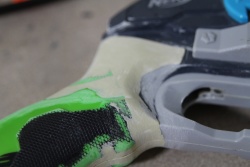
NERF SLEDGEFIRE (2)
LIST OF MODS: CUSTOM GRIP SINGLE SHOT SHELL 5MM SPRING SPACER PICTURES:
NERF DEMOLISHER- WARHAMMER 40K BOLTER #09 (SOLD)
LIST OF MODS: WORKER TRANSPARENT CAGE 42.5mm CRUSH BULLDOG FLYWHEELS MICHELLE 2.0 MOTORS 2S 7.4V LIPO MOSFET & FULL REWIRE CUSTOM PAINT JOB & WEATHERING MINIMISED FORE-END REAL METAL IMPERIAL AQUILLA HIDDEN VOLTMETER- ILLUMINATES ON REVVING FLYWHEELS PICTURES:
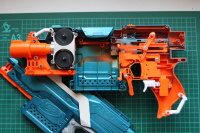
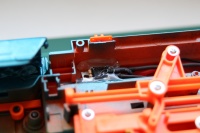
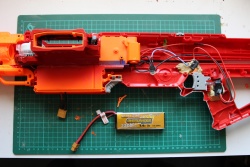
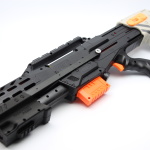
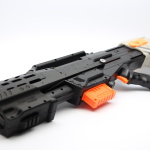
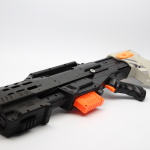
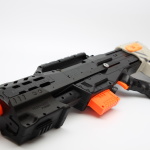
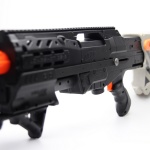
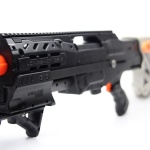
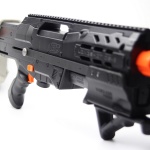
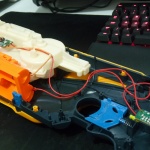
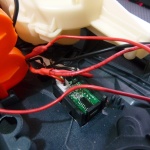
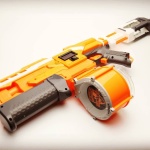
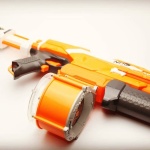
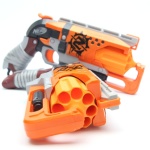
NERF DEMOLISHER- FULL-AUTO SOLENOID
LIST OF MODS: WORKER TRANSPARENT CAGE BULLDOG FLYWHEELS NEO RHINO MOTORS 3S 11.1V LIPO MOSFETS & FULL REWIRE PULSE GENERATOR 12V 35mm STROKE SOLENOID ( QUADRUPLE SPRUNG ) CUSTOM PUSHER AND GUIDE MECHANISM PICTURES:
I had intended to go with a Suild kit to make my life easier but alas, out of stock every time I checked so I went with the old-skool DIY option of a 555 timer-based pulse generator to drive the mosfet and solenoid- big thanks to Adrian Ward for the very handy wiring diagram he published a while back. I went with full-auto only for simplicity's sake; my finger and remaining functional braincells are my fire control. The hammering of the solenoid back & forth is very satisfying I must say, something that is missing from any stock Nerf blaster, not all that expensive either really to complete the mod so well worth doing if one has the skills and desire to try something fairly new.
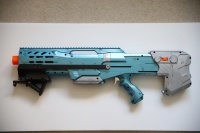
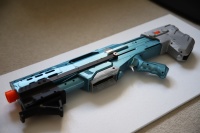
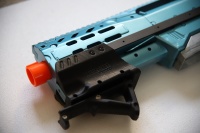
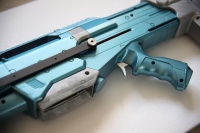
NERF STRYFE #08 (SOLD)
LIST OF MODS: WORKER ALUMINIUM CAGE FANG REVAMPED MOTORS 2S 7.4V LIPO MOSFET & FULL REWIRE OUT OF DARTS EXTENDED BATTERY DOOR BOBOLOLO STYLE REV TRIGGER WORKER EXTENDED MAG RELEASE MONTANA METALLIC CARIBBEAN SPRAY PAINT PICTURES:
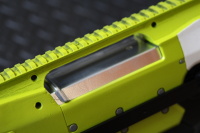
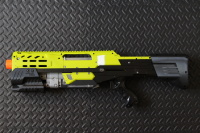
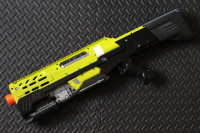
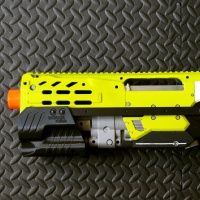
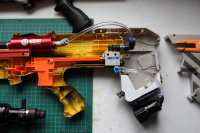
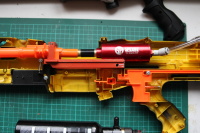
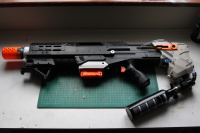
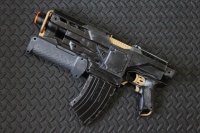
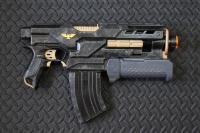
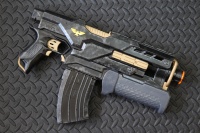
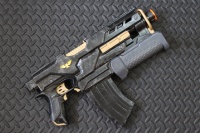
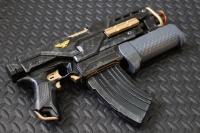
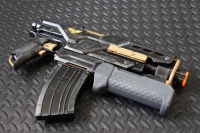
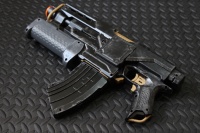
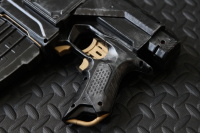
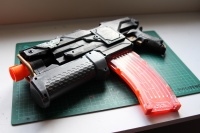
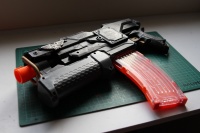
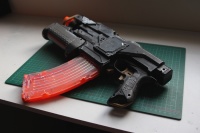
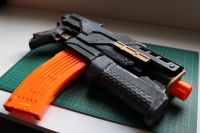
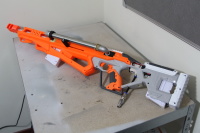
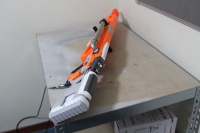
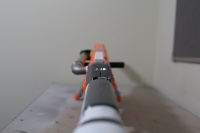
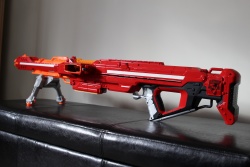
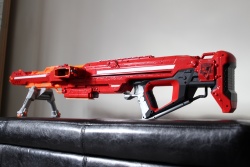
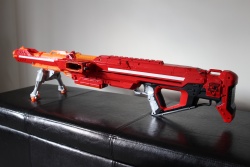
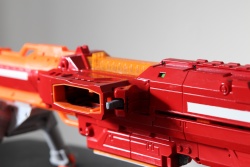
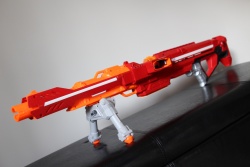
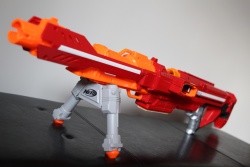
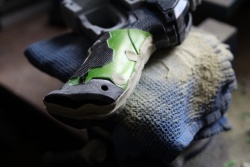
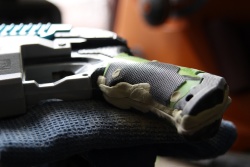
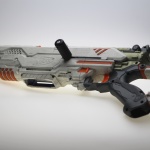
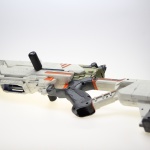
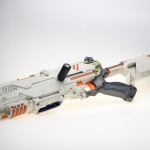
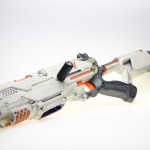
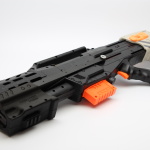
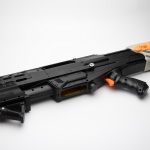
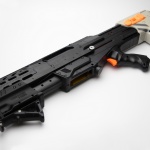
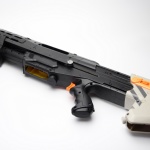
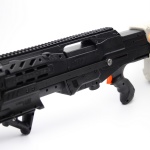
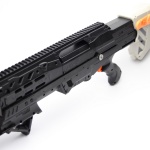
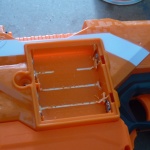
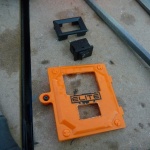
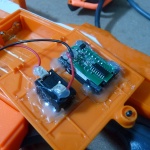
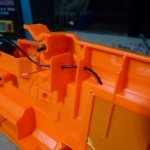
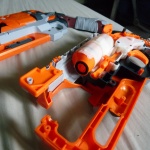
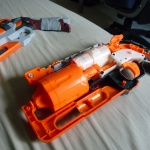
"PROTORAPTOR" (DECOMISSIONED)
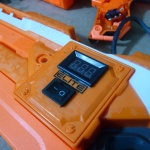
LIST OF MODS: HPA-POWERED RAPTORSTRIKE 1/2" QEV 2/3 WAY 12-VOLT SOLENOID VALVE LARGE DUMP-TANK VOLUME 3S 1300mAh LIPO MICROSWITCH TRIGGER LED VOLTAGE DISPLAY POWER SWITCHES FOR DISPLAY AND SOLENOID 9/16" BRASS BARREL AND SEALED BREECH ALUMINIUM OUTER-BARREL AND 3D PRINTED MUZZLE BRAKE PICTURES:
That said, whether one might consider it 'war-worthy' is another question- it is rather heavy around 7lb in weight so you wouldn't want to be lugging it around all day without a sling, though I suppose if you adopted a sniping position you wouldn't need to very often, so there is that. I did have to modify the mag-well slightly with some shims and a modified mag-catch so that the magazines sit a little lower and line up with the 'sealed' brass-breech and pusher assembly- it may not be a perfect seal but it's plenty good enough & the custom priming handles make it easy to slide the bolt closed firmly. Chrono testing gives some interesting results with ~240fps being easily achievable; I was able to push it to 300fps however that resulted in my Koosh Gen3 darts being decapitated or the foam ripping open with every shot so a more consistent and reliable lower velocity is preferable with the regulator set to around 40-50psi. I could probably achieve better results but I am limited to 30cm lengths of brass being in the UK- I did try sourcing longer alternatives but only met with disappointment- I ordered some PETG that was the perfect diameter but was sent the wrong size, I tried some aluminium tube but the tolerances or description were inaccurate and it always ended up being a bit too loose or tight ( make your own jokes ). Regardless though, I'd call this blaster successful as it does exactly what I set out to achieve- mag-fed HPA blaster with consistent fps, so that's good enough for me even if it is a little on the 'janky' looking side.
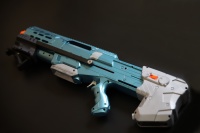
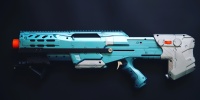
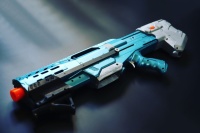
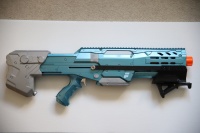
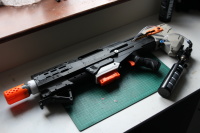
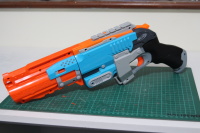
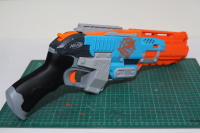
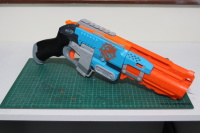
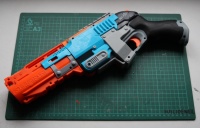
"RAPTURION" ( SOLD )
LIST OF MODS: CENTURION AND RAPIDSTRIKE INTEGRATION WORKER TRANSPARENT FLYWHEEL CAGE- 42.5mm CRUSH BULLDOG FLYWHEELS FANG REVAMPED MOTORS 2S 7.4v LIPO STOCK PUSHER MOTOR MOSFET FOR FLYWHEELS, OMRON MICROSWITCHES DUAL-STAGE TRIGGER FULL REPAINT PICTURES:
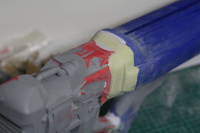
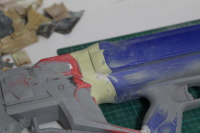
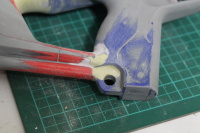
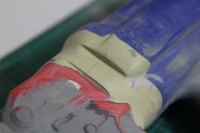
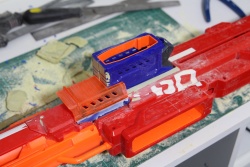
A key consideration when modding a RS is to keep the mag-well, flywheels and pusher arm perfectly aligned- even a tiny error here can cause massive headaches with nothing but dart jams and misery as a result, so I opted to minimise the RS whilst keeping those aforementioned items in one piece ( of shell ). This left me with a 'Rapidstrike module' essentially, and I had to find a way to mount it into the Centurion shell, so I scratched my head for a little while and came up with a plan that involved mounting the RS-module to the top of the Centurion's mag-well, allowing it to be removed in one piece for maintenance whilst keeping everything properly aligned. I had to chop a fair amount of the Centurion's shell away to make room for the flywheels and the new mag-well that sticks out to the side- this required some bodywork using leftover pieces of the RS shell, and a small piece of Diatron shell too. After blending these in ( more or less... ) all that was left to do was repaint the entire blaster in a nice shade of 'Post Office Van Red' from Hycote, hand-paint the dark grey & silver areas, mask off and paint some new white stripes, chop down a Mega-dart magazine to act as a battery tray and wire everything up based on a 2-switch Mosfet set up for simplicity's sake. Chrono results indicate around ~150fps and 7 darts per second, which is perfectly fine I recon- I was never going to set any records nor was I trying to, what I wanted to achieve was a Nerf LMG with a decent RoF and that looked like a somewhat stock blaster to the uninitiated, which I think I achieved fairly well unless you look closely enough. It's not compact, it's not for CQB, it's not quite shooting lasers, but it certainly looks intimidating given the size & when you have a drum-mag hanging out the side; perfect for reliving all of your Rambo fantasies...
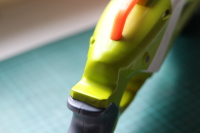
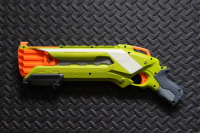
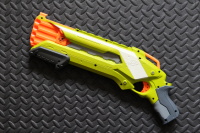
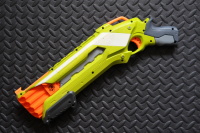
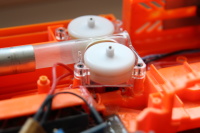
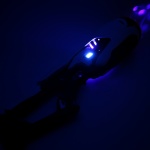
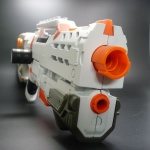
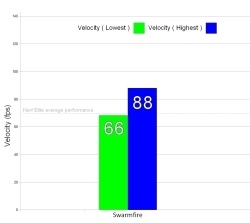
NERF SWARMFIRE (2) (SOLD)
LIST OF MODS: CUSTOM PAINT JOB BLUE LEDS AR REMOVAL PLUNGER DEAD-SPACE FILLED IN REWIRED FOR 3S LIPO PICTURES:
 The thing about Swarmfires is that they can often be had for dirt-cheap, so it feels rude not to grab one and give it a bit of a going-over when the urge arises. This time I went a bit further
with the paintjob and threw in some metallic gold and silver detailing where it seemed natural ( faux-screws and recessed sections of the shell mainly ), and inside I did a bit more work to the plunger-tube
by using some epoxy putty to filled in most of the dead-space at the head of the plunger where the air-restrictor once lived. Plunger-head was padded and blue LEDs added where I opened up the faux-vents with my rotary tool; these once however
were wired in parallel to the motor so that they only turned on when the trigger was pulled ( saved a lot of time trying to create a custom wiring loom with extra switches etc etc ). I think this one turned out really nice and is a step above my previous Swarmfire- given how
common they are on the 2nd hand market I can easily see myself doing some more in the future, they are more fun to work on compared to many blasters.
The thing about Swarmfires is that they can often be had for dirt-cheap, so it feels rude not to grab one and give it a bit of a going-over when the urge arises. This time I went a bit further
with the paintjob and threw in some metallic gold and silver detailing where it seemed natural ( faux-screws and recessed sections of the shell mainly ), and inside I did a bit more work to the plunger-tube
by using some epoxy putty to filled in most of the dead-space at the head of the plunger where the air-restrictor once lived. Plunger-head was padded and blue LEDs added where I opened up the faux-vents with my rotary tool; these once however
were wired in parallel to the motor so that they only turned on when the trigger was pulled ( saved a lot of time trying to create a custom wiring loom with extra switches etc etc ). I think this one turned out really nice and is a step above my previous Swarmfire- given how
common they are on the 2nd hand market I can easily see myself doing some more in the future, they are more fun to work on compared to many blasters.
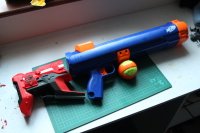
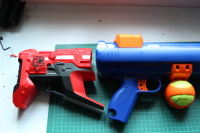
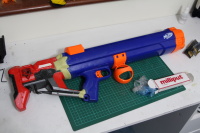
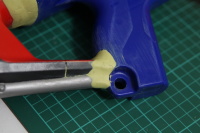
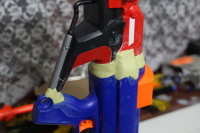
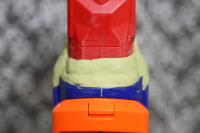
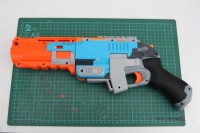
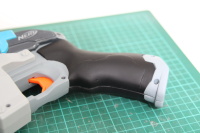
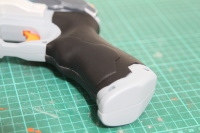
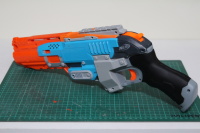
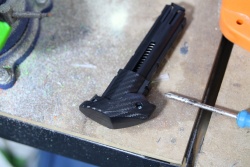
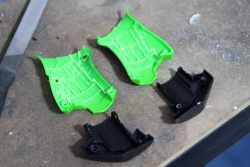
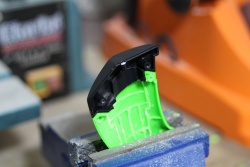
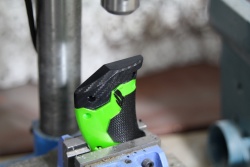
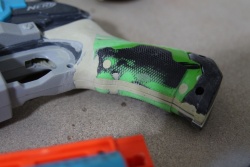
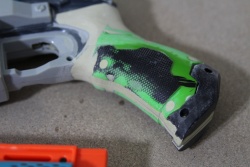
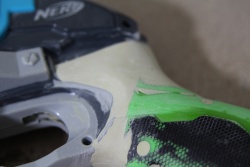
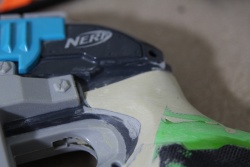
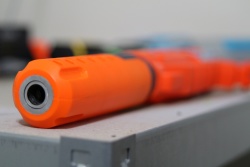
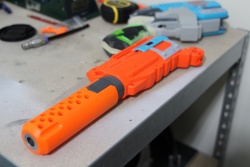
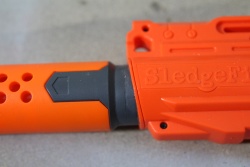
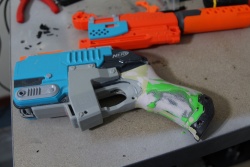
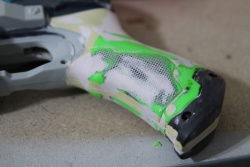
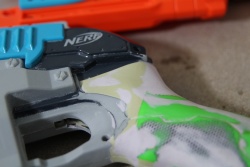
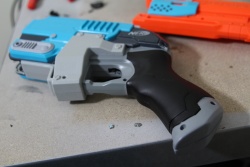
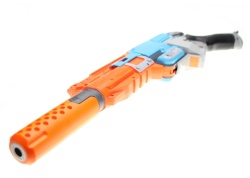
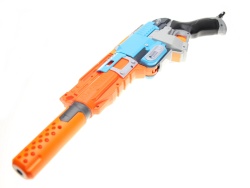
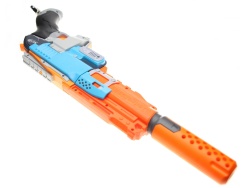
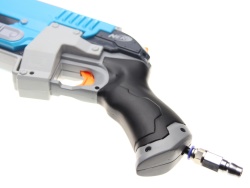
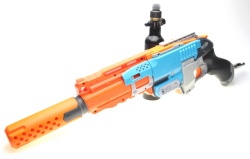
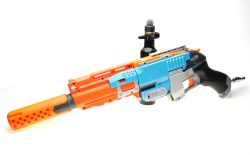
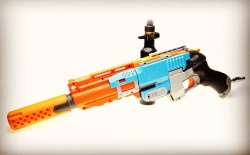
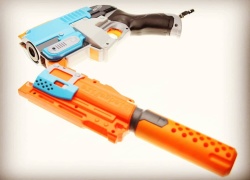
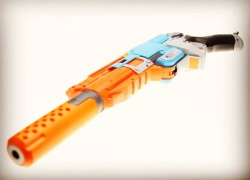
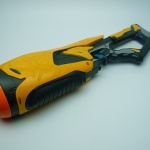
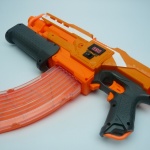
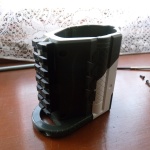
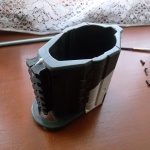
NERF SLEDGEFIRE HPA
LIST OF MODS: CUSTOM GRIP EXTENDED BARREL SPEXBZ HPA POWERED SINGLE SHOT PICTURES:
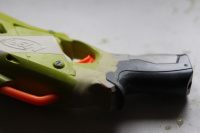
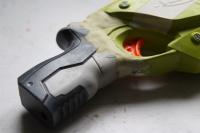
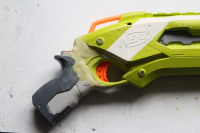
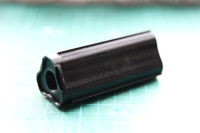
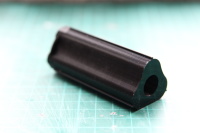
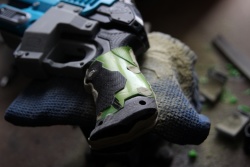
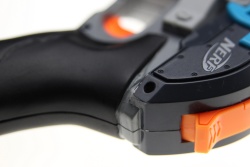
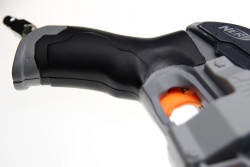
On the cosmetics/ergonomics side the biggest change was to replace the standard grip with something much nicer; I really, really wanted to get a set of grip-scales made by Hawki007, but he stopped making them a year ago so I had to do it the hard way. After a bit of digging I found out that he used a Tek Recon HammerHead ( a junky rubber-band blaster ) as the donor blaster, so I grabbed a dirt-cheap NIB item from Ebay and set about integrating its grips onto the SledgeFire using super glue and lots of Milliput ( epoxy putty ). What followed was lots of sanding, filing, filling, more sanding and finally painting- the end result is not perfect by any means but it is a massive improvement in ergonomics and looks compared to the stock grip. Over all I'm very happy with how it came out- the SledgeFire was transformed into a true hand-cannon that easily hits ~240fps+ and requires zero effort to prime unlike a blaster with a super-heavy spring in the stock plunger tube; being tethered to a small air bottle is not much of a drawback really considering how many shots it offers, the only real downside being the cost of the parts for the full rig, and the time required to do all of the work.
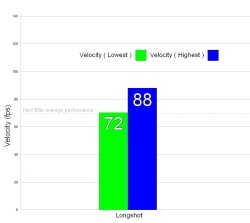
NERF LONGSTRIKE CS-6 (SOLD)
LIST OF MODS: MODIFIED STOCK AIR RESTRICTOR REMOVED CUSTOM PAINT JOB WITH WEATHERING MECHANICAL LOCKS REMOVED RE-GREASED CONTACT SURFACES ON MOVING PARTS CUSTOM PRIMING HANDLE PICTURES:
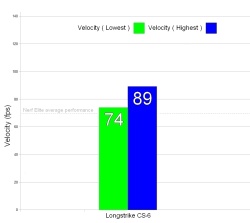 I was inspired by Adam Savage & Cobba to do... things... to a Longstrike, so I did this. Annoyingly the new Modulus Longstrike was announced and released after I already purchased my blaster ( used ) from ebay- that would have saved
me a lot of work but never mind I guess. I modified the buttstock the same way Cobba did, gave it a full paint-job complete with weathering, removed the AR and all the locks, and finally added a custom priming handle. Performance wise,
it actually shoots 74-89fps without the barrel attachment, and 66-81fps with it attached ( worn darts gave lower readings as they are a looser fit ). I don't normally do weathering but it really does wonders for the worn/used appearance
vs factory-fresh.
I was inspired by Adam Savage & Cobba to do... things... to a Longstrike, so I did this. Annoyingly the new Modulus Longstrike was announced and released after I already purchased my blaster ( used ) from ebay- that would have saved
me a lot of work but never mind I guess. I modified the buttstock the same way Cobba did, gave it a full paint-job complete with weathering, removed the AR and all the locks, and finally added a custom priming handle. Performance wise,
it actually shoots 74-89fps without the barrel attachment, and 66-81fps with it attached ( worn darts gave lower readings as they are a looser fit ). I don't normally do weathering but it really does wonders for the worn/used appearance
vs factory-fresh.
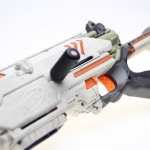
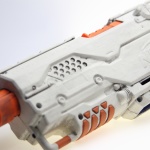
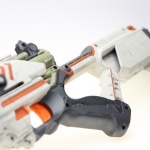
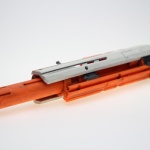
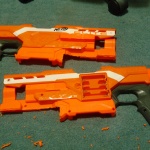
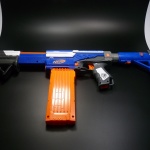
NERF LONGSHOT PUMP-GRIP
LIST OF MODS: 2017: 10KG SPRING ALUMINIUM BOLT SLED AIR RESTRICTOR REMOVED PRESSURE-RELIEF HOLE FILLED MECHANICAL LOCKS REMOVED NEW O-RING SEAL ON PLUNGER RE-GREASED CONTACT SURFACES ON MOVING PARTS PADDING ON PLUNGER HEAD WORKER/F10555 PUMP-GRIP KIT CUSTOM PAINT-JOB 2018: 14KG SPRING GAVIN FUZZY PICATINNY TOP RAIL PICTURES:
2018 update: As much as I thought I was done with this Longshot, I kept thinking it needed a little more performance, and something to give it a meaner look as well. I opted to install a Worker 14KG spring and a Gavin Fuzzy Picatinny top rail kit- both were easy to fit and made a noticeable difference to the appearance and FPS; performance went from a max of 96FPS to a max of 124FPS- a decent 30% improvement without a Brass Breech. A sealed breech would be a nice upgrade worth looking into however but right now I'm happy with this blaster as it stands.
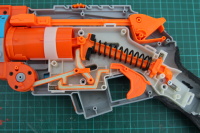
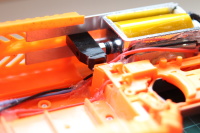
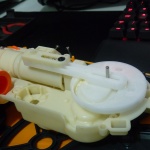
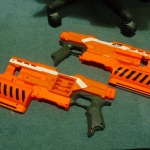
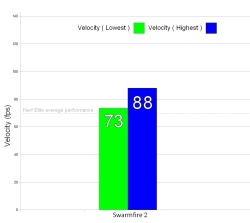
NERF SWARMFIRE (SOLD)
LIST OF MODS: BLASTERPARTS UPGRADED SPRING AIR RESTRICTOR REMOVED VOLTAGE DISPLAY WITH ON/OFF SWITCH 3S LIPO BATTERY BLUE LEDS FULL PAINT JOB PICTURES:
 I've wanted a Swarmfire for a long time, it was 2nd on my list after the Longshot so when a good condition model turned up on ebay a little while back I grabbed it quick- more powerful blue trigger model too which is a bonus, if I was
keeping it stock. As it is, I wasn't- gave the internals a good going over with a new spring, deleted AR, lipo power, plus I even added a stronger spring to the pawl to prevent skipping of the turret as it rotates. I gave it a nice black & white
paint job with blue leds for some wicked night time illumination- not very tactical but who cares, it looks wicked. Shoots harder than stock, around the 80fps on average, so generally better than stock performance and rate of fire is a bit better using a 3s lipo
compared to the 6 C cells it normally takes ( 12.6v versus 9v ). Some people go as far as using 4s lipos but I don't want to destroy the internals too quickly, dry firing is not recommended once you remove the AR on any Nerf blaster.
I've wanted a Swarmfire for a long time, it was 2nd on my list after the Longshot so when a good condition model turned up on ebay a little while back I grabbed it quick- more powerful blue trigger model too which is a bonus, if I was
keeping it stock. As it is, I wasn't- gave the internals a good going over with a new spring, deleted AR, lipo power, plus I even added a stronger spring to the pawl to prevent skipping of the turret as it rotates. I gave it a nice black & white
paint job with blue leds for some wicked night time illumination- not very tactical but who cares, it looks wicked. Shoots harder than stock, around the 80fps on average, so generally better than stock performance and rate of fire is a bit better using a 3s lipo
compared to the 6 C cells it normally takes ( 12.6v versus 9v ). Some people go as far as using 4s lipos but I don't want to destroy the internals too quickly, dry firing is not recommended once you remove the AR on any Nerf blaster.
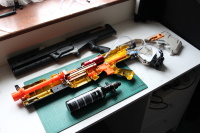
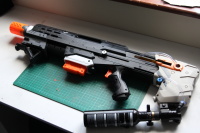
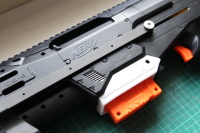
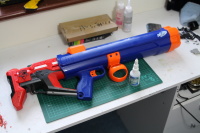
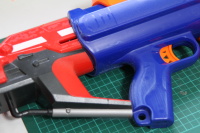
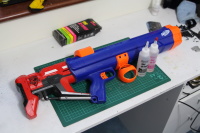
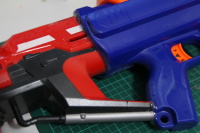
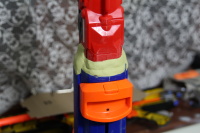
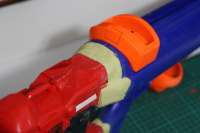
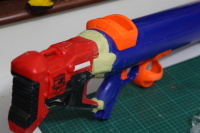
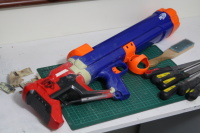
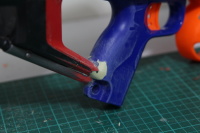
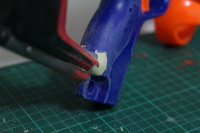
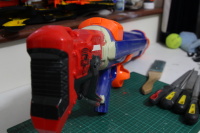
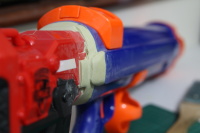
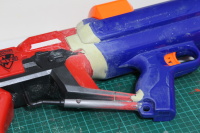
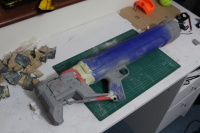
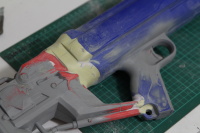
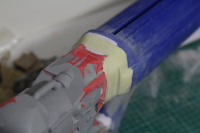
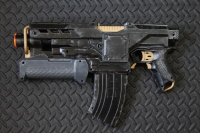
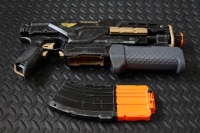
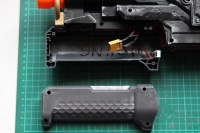
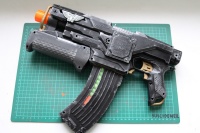
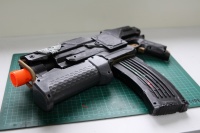
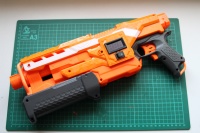
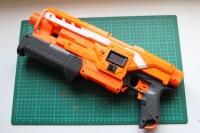
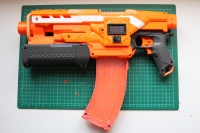
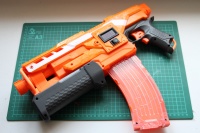
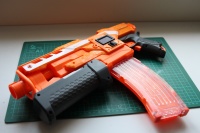
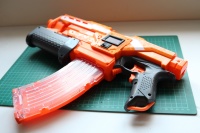
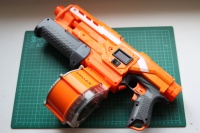
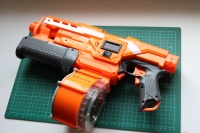
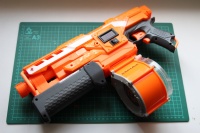
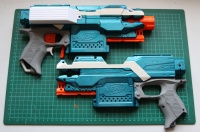
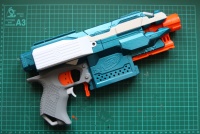
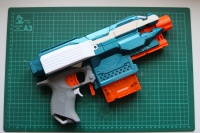
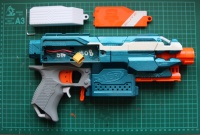
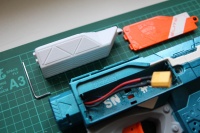
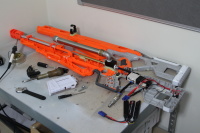
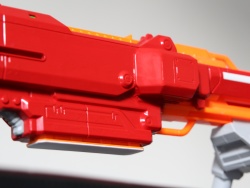
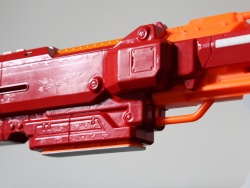
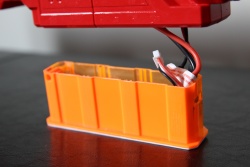
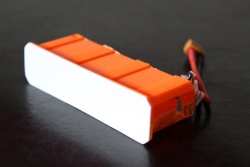
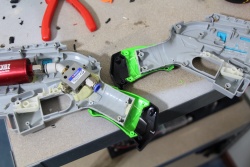
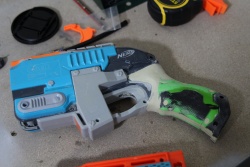
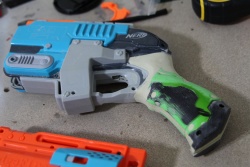
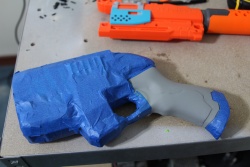
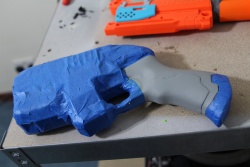
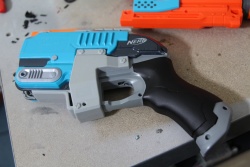
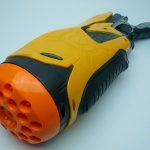
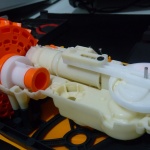
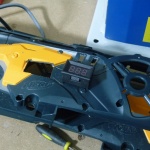
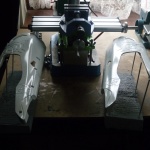
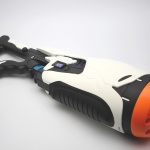
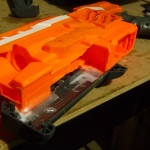
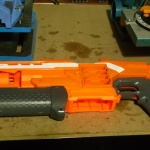
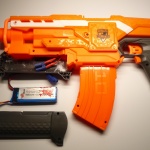
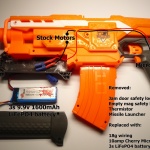
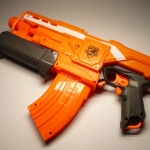
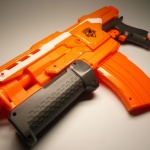
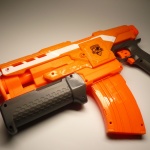
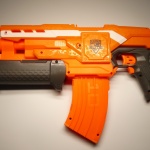
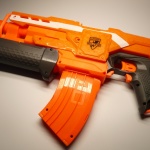
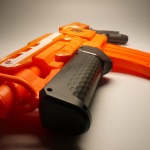
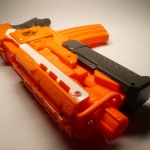
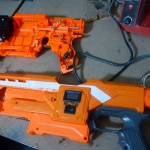
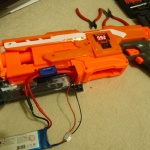
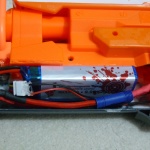
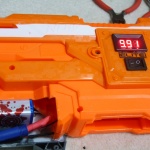
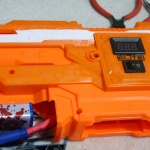
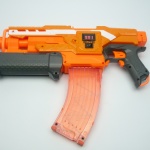
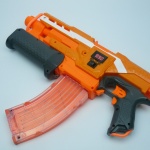
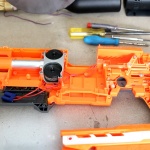
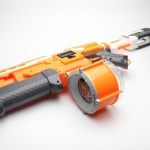
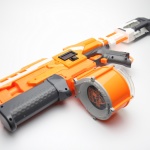
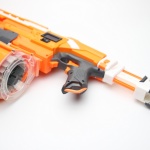
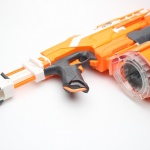
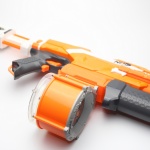
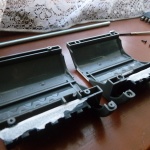
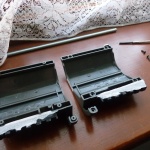
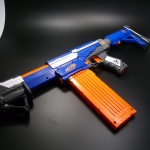
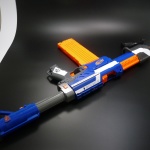
NERF DEMOLISHER
LIST OF MODS: 2017: MINIMISED FORE-END UPGRADED WIRING REMOVED LOCKS & SAFETY SWITCHES REMOVED THERMISTOR 3S LIFE BATTERY VOLTAGE DISPLAY WITH ON/OFF SWITCH 2018: WORKER FLYWHEEL CAGE WORKER FLYWHEELS DRAC FANG 130 MOTORS ALUMINIUM DART GUIDE KNOCK-OFF REINFORCED SHOULDER STOCK PICTURES:
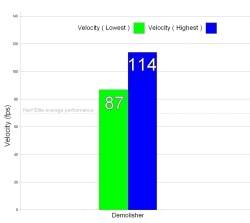 I never really thought I would get a flywheel blaster, I tend to see them as too noisy and a nuisance in requiring batteries; that said, the performance and rate of fire is rather impressive, and one blaster in particular caught my eye for its modding possibilities.
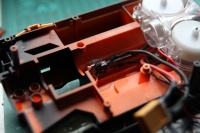
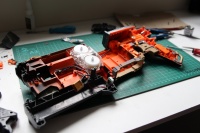
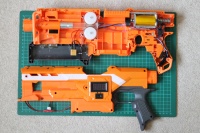
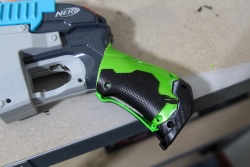
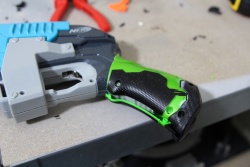
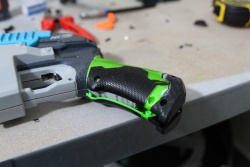
So, I picked up a lightly used Nerf Demolisher with the intention of doing some fairly standard mods to the electronics, but also minimize the front of the blaster by removing the silly missile launcher and reusing the pump-grip to make a new fore-end grip for better looks and ergonomics.
I never really thought I would get a flywheel blaster, I tend to see them as too noisy and a nuisance in requiring batteries; that said, the performance and rate of fire is rather impressive, and one blaster in particular caught my eye for its modding possibilities.
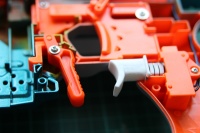
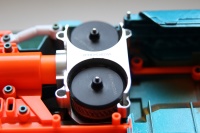
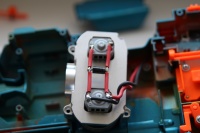
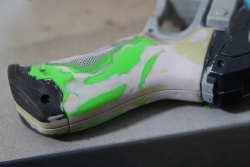
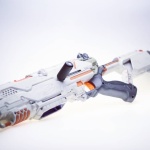
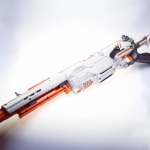
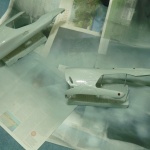
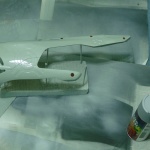
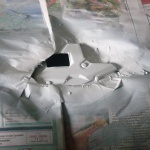
So, I picked up a lightly used Nerf Demolisher with the intention of doing some fairly standard mods to the electronics, but also minimize the front of the blaster by removing the silly missile launcher and reusing the pump-grip to make a new fore-end grip for better looks and ergonomics.The project is now complete, and the blaster is performing awesomely, if somewhat loudly thanks the increased power. The whole wiring loom was torn out and replaced with 18 gauge silicon insulated wire, and a 10amp Cherry Micro switch- the safety locks were all removed apart from the rev trigger safety in order to prevent jams. The missile launcher was removed and the pump grip sanded and filed then attached to the fore-end- but only on one side. The other side can be removed via 4 screws in order to access the new LiFePO4 battery that powers the blaster. I went with a 9.9v 3S pack since it gives more power than a 2S Lipo, but not as much as a 3S Lipo so the motors should last longer while still giving very impressive performance compared the the stock 4x AA batteries. The hardest part of the project was sanding down the pump grip to make it fit the fore-end of the blaster- this was to be expected and was just a case of sanding a little, test fitting, then sanding and filing some more until the two halves of the grip could close together over the fore-end of the blaster. It took a while, but I have now added a voltage meter and switch to turn it on and off independently of the main power to the motors- I didn't need to, but it's a pain to keep unscrewing the foregrip to access the battery connectors, so now I can leave everything plugged in and occasionally check the battery voltage- there is no drop in voltage unless I'm actually revving the motors or leave the display turned on. I added the display and its power switch to the original battery compartment cover since it gave the required space for the wiring and rear of the display, no issues with routing wires around the tight interior of the shell. 2018 update: Much like the Longshot, I thought I was finished with the Demolisher too, but I also kept wanting to do something about the noisy flywheels. I decided to install a Worker Flywheel cage and flywheels, and Drac's new Fang motors- the cage was designed for the Stryfe but it only took a bit of work to snip off one of the mounting posts on the shell and removing to plastic likewise to enable the cage to fit properly. This did leave a small hole in the shell however, so I made up a little pair of fangs from a scrap of white styrene plastic to cover the hole, and hint at what was inside of this otherwise fairly stock looking blaster ( other than the deleted missile launcher ). Performance jumped a bit to 100-120fps, and there is no more awful rattle or vibrations from the flywheels which is nice. I also picked up a couple 25 round drum mags to run with the blaster- they both received a Foam Blast replacement spring which is supposed to be stronger in order to reduce jams; truth be told I can't really tell any difference, drum mags just don't like being fully loaded, they'd need a much, much stronger spring or different winding mechanism in order to be more reliable. Still, they do work and they really look great with both the Demolisher and the Longshot, so I'm happy. A build video is up on Youtube so be sure to check it out. WHITE LONGSHOT (SOLD) LIST OF MODS: STRETCHED SPRING AIR RESTRICTOR REMOVED PRESSURE-RELIEF HOLE FILLED MECHANICAL LOCKS REMOVED NEW O-RING SEAL ON PLUNGER RE-GREASED CONTACT SURFACES ON MOVING PARTS PADDING ON PLUNGER HEAD CUSTOM PRIMING BOLT CUSTOM PAINT-JOB FRONT-GUN SHELL INTEGRATION OPEN SIGHTS & PICITINNY RAIL ADDED JAM DOOR MODIFIED TO OPEN AT ANY TIME PICTURES:
 I decided to go with a fairly minimal and clean looking paintjob, rather reminiscent of the old 'Whiteout' series of Nerf blasters; I had a little bit of trouble with the paint reacting with the primer in a few small spots, and a bit of flaking around the slot for the priming bolt, but overall I think it came out rather nicely.
I used Plastikote Grey primer & Super matt white, along with some matt clearcoat and Humbrol gloss black & orange for the details. The front gun pump slides back & forth but isn't functional, performance is much improved overall due to the heavier spring and modified bolt & much nicer priming handles. NERF ZOMBIESTRIKE HAMMERSHOTS LIST OF MODS: 2016: 7 SHOT CYLINDER AIR RESTRICTOR REMOVAL 2017: 10MM SPRING SPACERS 8 SHOT CYLINDERS PICTURES:
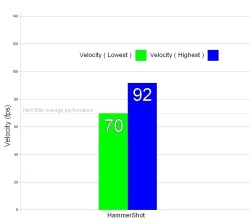 The Hammershot is such a well performing blaster in stock form there is little need to mod very much- A/R removal makes little difference, though dart-post removal does allow you to use any type of dart you like.
You can get stronger springs and different sized hammers to make single-handed use easier, but personally speaking I'm more than happy with how the blaster performs with the 2 basic mods I've done.
The Hammershot is such a well performing blaster in stock form there is little need to mod very much- A/R removal makes little difference, though dart-post removal does allow you to use any type of dart you like.
You can get stronger springs and different sized hammers to make single-handed use easier, but personally speaking I'm more than happy with how the blaster performs with the 2 basic mods I've done.
2016 update: A modder with a 3D printer released a 7 shot turret/cylinder that is a drop-in replacement for the 5 shot standard item, so I purchased one and it arrived recently. Fits perfectly, the print quality is quite good and the seal with the darts is better than stock so performance has increased slightly too. Shame it only comes in black at present, orange, light grey or dark grey would have blended in better but it doesn't matter much. 2017 update: A new modder also with a 3D printer released an 8 shot cylinder along with a 10mm spacer, so I picked up a couple of them and another HammerShot so that I had a matching pair of side-arms. He goes by the name AtchAttachments on Etsy, should be easy to find if you are interested- the quality is excellent and the spacer provides a decent 20fps boost over stock performance. NERF ELITE ALPHA TROOPER (SOLD) LIST OF MODS: OZNERFNERD UPGRADED 5KG SPRING OZNERFNERD UPGRADED TRIGGER CATCH & SPRING GUIDE REMOVED MECHANICAL LOCKS RE-GREASED SEALS AND CONTACT SURFACES ON MOVING PARTS ANGLED FORE-GRIP INTEGRATED INTO PUMP PRIMING HANDLE JAM DOOR MODIFIED TO OPEN AT ANY TIME RAIDER SHOULDER STOCK PICTURES:
 Once again, the Elite Alpha Trooper is another blaster that performs very well out of the box, but with the addition of a stronger spring and upgraded trigger catch & spring guide from OzNerfNerd, it performs even better.
Removing a few of the mechanical locks results in smoother priming and firing, with very few jams to speak of. Adding the Raider shoulder stock transforms the blaster into a very versatile weapon, and it's design is the best looking of all the Nerf stocks in my opinion. | |