|
|
|
A CUSTOMIZED SNOW WOLF AIRSOFT PULSE RIFLE PROJECT I HAVE BEEN A LIFE LONG FAN OF THE ALIENS FRANCHISE, SO IT'S A DREAM COME TRUE TO HAVE MY OWN CUSTOM PULSE RIFLE. |
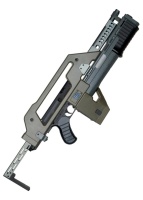
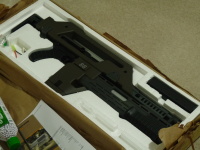
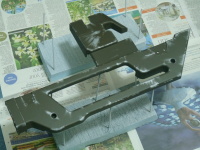
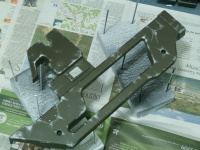
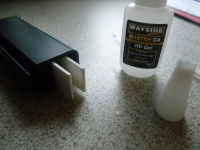
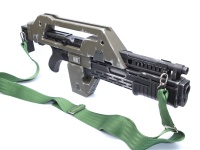
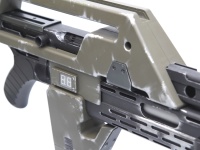
PLAN FOR THE PROJECT The first hurdle of the project was finding a Pulse Rifle, and actually being able to buy it- in the UK we are simply not allowed to buy an Airsoft gun without being a member of UKARA, an organisation for airsofting much like the NRA in America or the BASC in the UK which speaks up for shooting sports. The government requires this membership in order to prevent stupid people buying replica firearms and doing something silly with them- without a UKARA membership you are only allowed to buy two-tone airsoft guns, which are painted at least 51% bright red, blue, green etc ( or transparent ). Alternatively, you must be able to prove that you are a legitimate collector of replica and/or deactivated firearms, which is equally as awkward. Thankfully, there are a few airsoft retailers whom are intelligent enough to know the difference between a RIF ( Replica Imitation Firearm ), and an IF ( Imitation Firearm )- the point here is that an IF is simply a gun that isn't intended to be a replica of any real-steel firearm. The Aliens PulseRifle is obviously not a real gun, in appearance, regardless of being made from working firearms in the film. As such, I was able to buy a Snow Wolf Aliens Pulse Rifle AEG which wasn't two-tone, making it the ideal base for my project. Below are some stock images of how it looked before I started tearing it down for mods and a custom paint job. | ||||||||||||||||||||||||||||||||||||||||
|
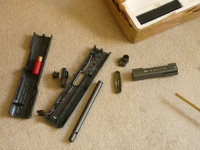
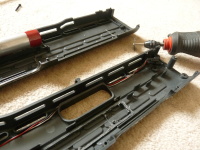
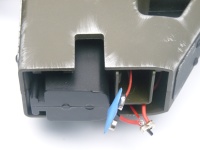
| STRIP DOWN AND INSPECTION When the Pulse Rifle arrived the first thing I did was plug in the battery only to be met with... nothing. I plugged the battery into the supplied charger, only for both of them to get alarmingly hot very quickly. At this point I tested the battery with my multimeter and found that the 8.4v pack only had a voltage of 0.24v- completely dead and unsalvageable. Not too much of an issue as the charger battery were only low quality items, so they both went in the bin- I will be buying a 2s 8.4v lipo to use with this project. I dismantled the rifle by undoing the numerous different screws, a few of which were tiny T8 or T9 Torx that came cross threaded from the factory and couldn't be removed easily, so I had to dremel a slot in their heads and undo them with a flat bladed screwdriver. The main issue I wanted to address with the electronics was the quality of the wire and the awful mini Tamiya connector used for connecting the battery- as it happens the wire itself can't be replaced completely without tearing into the real guts of rifle, which I really don't want to do due to the risk of borking it. Based on the numerous videos I've seen and other reviews it seems the wiring is thick enough, so I just replaced the connector with a nice EC5 plug, meaning I can charge whichever Lipo I end up using on my Lipo charger without needing to create a new adapter for the battery itself ( EC5 are going out of fashion these days, in favour of XT60 and XT80 plugs, but both are more than ideal for handling very large currents- I don't intend to change all my connectors and charging leads just to be fashionable ). With the new connector installed I hooked up a small 3s Lipo from my Chronograph light unit and confirmed that the Pulse Rifle now fired with a satisfying 'thunk' sound- just a couple trigger pulls in semi-auto since dry firing is never good for an Airsoft gun. | ||||||||||||||||||||||||||||||||||||||||
|
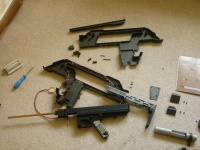
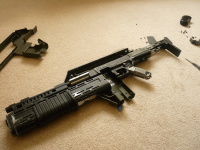
| PAINTING, WEATHERING AND RE-ASSEMBLY As-is, the Pulse Rifle looks pretty good, the shroud is a nice shade of Olive Drab, or near enough- I've seen countless reference photos of the Hero props and replica kits, and the shade of green used on this Airsoft replica is pretty faithful to the on-screen colour. That said, the shotgun shroud and barrel cover are not very screen-accurate at all, being a mix of three or four shades of dark grey and gun-metal colours, where as the real weapon is all matt-black. I picked up a can of Plastikote Super Matt Black and sprayed the parts with a few light coats, which dried to a nice finish and made a good base for the next stage. I had an old can Chrome spray paint which would be ideal for dry-brushing on the weathering effects- simply spray the paint into a suitable container ( a cleaned Tuna tin in my case ) and dip a short-bristle brush into it, then wipe off most of the paint onto newspaper, and gently brush it over the edges of the Pulse Rifle shroud, creating the appearance of bare metal showing through the black paint. I did this around all the vent holes, the tips of the barrel and grenade launcher, the butt stock and all around the shroud. This is the first time I've done weathering effects on a model or prop, and I can safely say it was a lot of fun, well worth taking the extra time to create something that looks 'real', instead of looking like a shop-bought toy that is shiny and new its whole life. Next up, I will be re-assembling the Pulse Rifle and doing a firing test to make sure I didn't actually bork it during painting. | ||||||||||||||||||||||||||||||||||||||||
|
| |||||||||||||||||||||||||||||||||||||||||
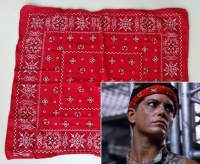
A FEW MORE TWEAKS... With most of the painting done and clear coat applied ( I also painted the green shroud with the same silvering technique- I just need to do the magazine cap as I forgot about that, derp ), I did indeed confirm the Pulse Rifle still operates just fine and started putting it back together, as task made easier thanks to the colour photos in the manual; it isn't exactly a proper disassembly guide, more of a how-to convert a regular Thompson M1A1 into a Pulse Rifle guide, but it does the trick. I had really wanted to swap the dummy shotgun shell for a dummy Pulse Rifle Grenade- they are available from a few different prop makers, but most are in the USA so postage really stacks up the price. I did find a UK seller who also sells various other Aliens ( and StarWars ) related props and prop replicas; I placed an order but never heard anything back- turns out he is well known for just forgetting/ignoring people and/or taking forever to get back to them with payment details so I gave up and just painted the shotgun shell to look more like a grenade; not ideal but it'll do just for display. I also wanted to get a resin cast of the Smith & Wesson Model 4506- it is quite literally impossible to find any replica or airsoft Model 39 that Vasquez uses in the film but the Model 4506 is very similar, just needs a few tweaks to the sights and grip panels and it becomes a 95% dead-ringer, once you paint the grips Pearl White. As before though the seller was a dead-end so I ended up finding a metal cap-gun that was based on the Model 4506 and gave it a little bit of a make-over; even more less than ideal and kinda looks a bit rough compared to the casting I wanted, but oh-well; the PulseRifle is the real gem of my display, along with the screen-accurate dog-tags, embroidered badges & screen-accurate vintage bandanna. See you with the next update, not too long hopefully- stay tuned. | |||||||||||||||||||||||||||||||||||||||||
|
|
|||||||||||||||||||||||||||||||||||||||||
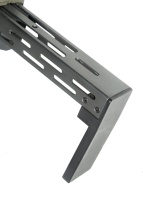
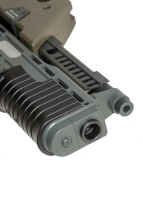
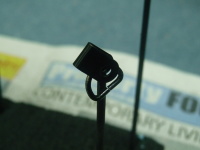
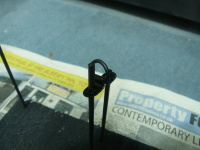
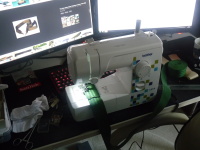
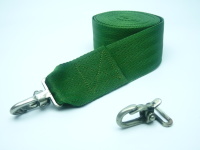
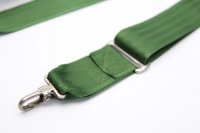
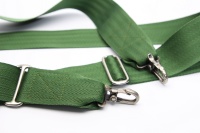
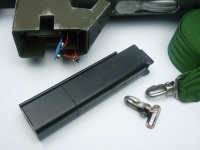
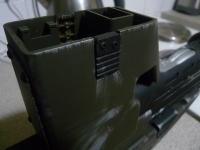
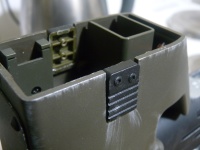
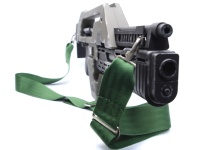
WORKING ON THE SLING Three months wasn't too long, was it? Well, it was for me- I gave up waiting to hear back from the guy I 'ordered' the items I needed. I don't like sending messages and emails asking for updates, feels too much like hassling them and that can just lead to them getting fed up and cutting you off- if they've lost your details or are too busy with real work or real life, then fine, but I can't wait forever so I've un-paused the project and got to work on a few details that needed doing before the Pulse Rifle can be called finished. Firstly, I made a couple mounting points on the Pulse Rifle for the sling- one up front on the barrel heatshield, and one in the rear on the shoulder stock. I used some D-rings and screwed the front one in place through one of the slots, the rear one I made by flattening out the D-ring holder and using longer screws to mount it where the butt plate screws to the sliding horizontal part of the stock. Impossible to exactly replicate the screen used mounting points that are welded in place, but this is damn close so it works for me and a few other guys who've made replica Pulse Rifles. Second item that needed addressing was a bit more difficult, in that I required a fairly screen accurate Sling- I didn't want to cheap out and just use a generic rifle sling, so I decided to make my own. Now, I haven't used a sewing machine in 20 years or more, but it turns out it's not too hard to get back into the swing of things once you read the manual and familiarise yourself with the few important things, namely threading the machine and bobbins up correctly, and remembering which way the machine pulls the fabric through as it sews- that nearly caught me out a few times I must confess. I purchased some decent quality Olive-drab 2" / 50mm wide webbing that closely matched the real prop, although the prop used 8 stripe webbing and I could only find 9 stripe webbing; we'll call that close enough I think. Finding the correct style of sling swivels or clips took a bit more work but a few hours of trawling ebay yielded the correct items- turns out they are fairly common and quite a few sellers have them in stock; I like the fact that most of the original black paint is worn off, just adds that extra layer of authenticity. I referenced a few photos of the original props to see how they were constructed- quite simple really, just a square with an X through it to secure the material together, along with the metal Sliders to create one end and add some adjustment; I have to wait for the metal Sliders to arrive to finish my sling, but so far it looks great, even if I do say so myself.
|
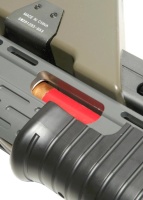
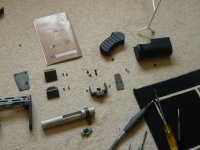
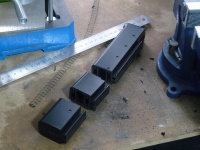
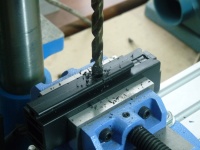
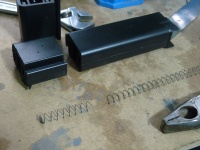
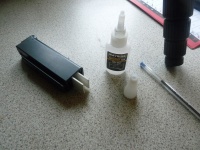
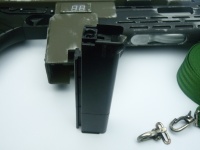
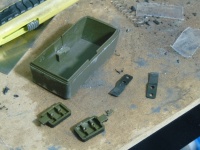
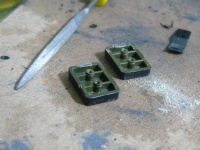
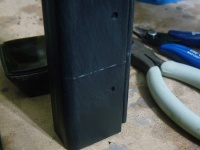
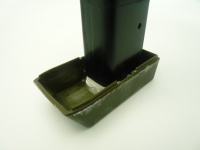
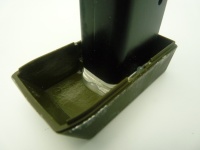
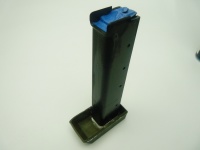
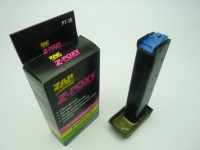
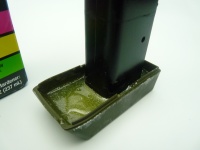
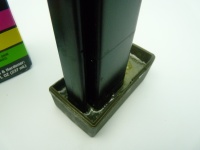
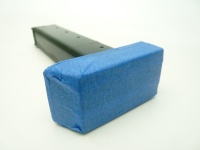
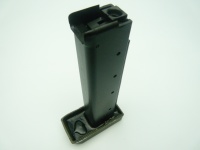
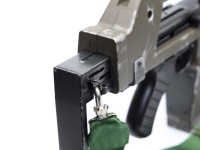
NEW MAGAZINES AND MAG BASES The problem with the SnowWolf Pulse Rifle is the included magazine; it is a 'Hi-cap' ( high capacity ) magazine that holds around 190 bbs, and as such needs to be wound up via a small wheel protruding from the bottom in order to feed bbs into the rifle- it needs to be wound up a good 3 or 4 times to feed a full magazine and this is a pain as it requires removing the false mag base to access the winding wheel. The only real alternative and one which is much more desirable at that is to replace the Hi-cap magazine with a Mid-cap, since these do not require winding up in order to feed bbs. The only catch is that Mid-caps are longer that the Hi-caps, so they need to be cut down by about 1.5 inches; this I can live with. I ordered a set of 5 magazines from RedWolf Airsoft, and armed with a bit of knowledge from the interwebs I started out by first removing the feed spring from the magazine, then slicing the magazine in half roughly with my band saw. I then proceeded to slice 1.5 inches from the upper half, and after adding a little support material and cleaning up the edges, glued the two halves back together using some epoxy resin. I reinstalled the feed spring and loaded up the magazine to test it still worked correctly, thankfully it did so I will repeat the procedure for the remaining 4 magazines- my next task is to order 4 more mag bases from Evike , and epoxy the new magazines into the bases so that they function just like the real prop, rather than the magazine and mag base being two separate items.
|
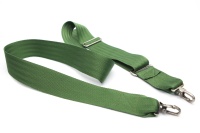
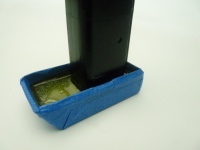
FINAL PHOTOS I finished making the sling, very happy with how it came out- better than how many other fan-made ones look ( did I mention that before? I might have.. ) so I can certainly see myself offering a few of these for sale ( I have enough webbing leftover to make a couple more slings ) if there is a demand for them. The magazine base integration turned out quite well, save for some air bubble in the resin I used, and it seems I need to recess the 9v battery a bit deeper into the mag-well as it sticks out too far and contacts the inside of the mag-base before it full seats into place. Not the end of the world, I just elected to leave out the 9v battery for the final photos, I'll go back and sort that out later and show what I did there. So, without further ado, here is my custom Aliens M41a Pulse Rifle, complete with custom magazine and sling- enjoy:
|
|
| |||||||||||||||||||||||||||||||||||||